Showing posts with label painting. Show all posts

Thursday, March 01, 2012

Bath Paint

My kids loved this activity.  Painting in the tub is wonderful!  They would have stayed in the bath all night had I let them.  Bath paint is really easy to make and clean up, too.  So I'm logging this one for one of those days when we're all going stir crazy in the house and don't want to leave.  It doesn't have to be night time to take a bath.

SUPPLIES:


  • Soap (I used baby soap-pictured above)

  • Cornstarch

  • Food coloring

  • Ice cube tray (or something similar to mix the different colors)


INSTRUCTIONS:

  1. Mix equal parts of soap and cornstarch with a spoon.  (I mixed 1/4 cup soap, 1/4 cup cornstarch and it seemed like the perfect amount)

  2. Place a little bit of mixture in each compartment of the ice cube tray.

  3. Add 1-3 drops of food coloring per compartment depending on how vibrant you want the color.


In the bath, the children can use paint brushes, foam brushes, sponges or their fingers.  It was super easy to clean up, but be careful.  Since there is so much soap in this mixture, it makes the bath really soap and slippery.

In case you're wondering, food coloring did not stain my bathtub.

Friday, July 02, 2010

Happy 4th of July Weekend!


Happy 4th of July weekend!  It's one of my favorites because it's filled with family time and a day or so off work.  It's also filled with red, white and blue food.  And what's not to love about that?  Luckily Martha has an entire display of pretty food, like the one pictured above with recipes on her site.


And speaking of blue, I'll be getting rid of some around the house this weekend.    We had an incident a little while back where paint was knocked off our stair ledge (who would ever think to put it there I wonder???).


The carpet was easily replaced because we had a remnant left over from the install.  But see that little splash up on the stairs?  It's still there and we'll be painting over it this weekend.  And after I'm done with that, I'm going to keep painting.  I hope to get everything touched up around the house, and maybe even paint the laundry room if time allows.


How about you?  What are you up to this weekend?


Monday, April 12, 2010

Monday Tutorial: DIY Painting Techniques

Happy Monday everyone!  We are switching things up on Fresh Nest today and giving you a little DIY inspiration.

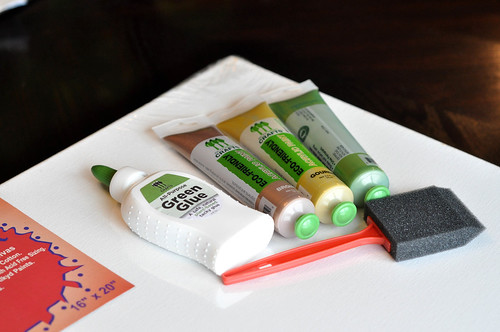
We are in the process of redoing our bedroom and while I was at the CHA winter show, I saw a great presentation by EcoGreen Crafts about their paints and different ways to texturize while using their paints.  They gave me a few products to play with at home, and I had about an hour to play the other day so I figured I'd give it a try on blank canvases I purchased.

Using Glue as Texture

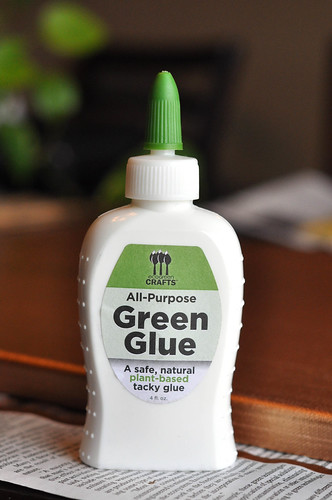
Note: I used their wonderful glue that is eco-friendly {and edible!}, but you can use any glue you'd like when doing this technique.

Supplies:


  • Painting Surface {I used canvas, but their paints work on any surface-- even wood!}

  • Glue

  • Paint Brush

  • Cloth or Napkin

  • Sealer {like this}


Painting with Glue


Painting with Glue


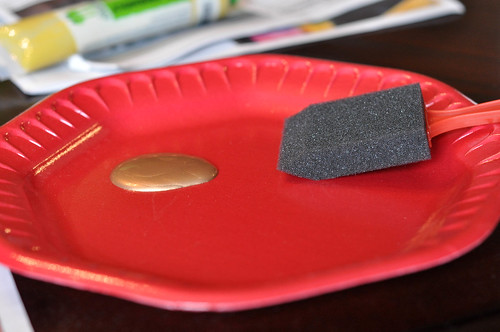
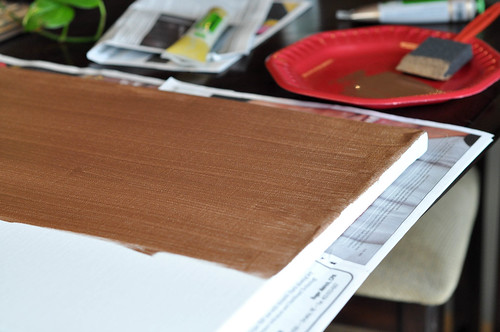
I started by painted my entire canvas with the bronze paint.  Look at that color!  Amazing, huh?

Painting with Glue


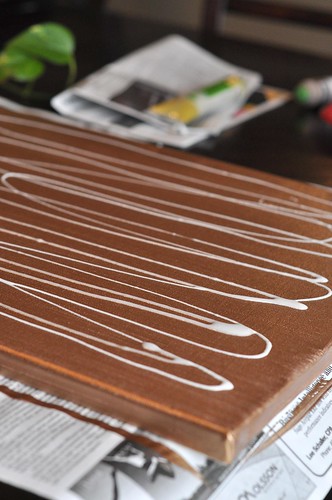
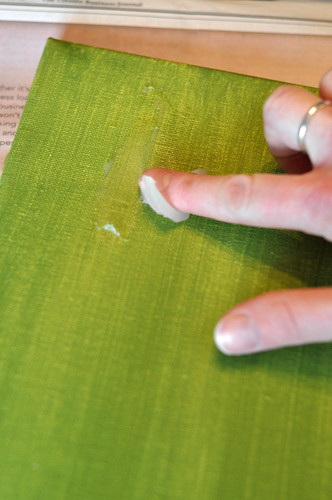
Then I took the glue and spread it around the canvas on top of the bronze coat.

Painting with Glue


Painting with Glue


Painting with Glue


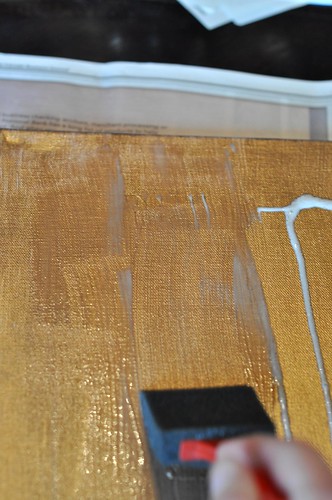
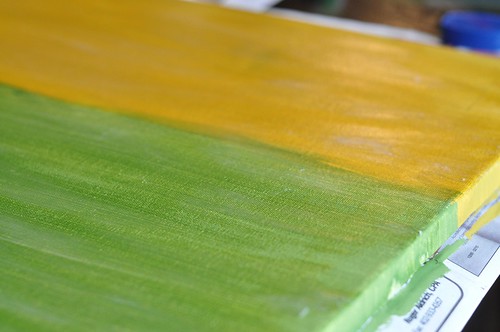
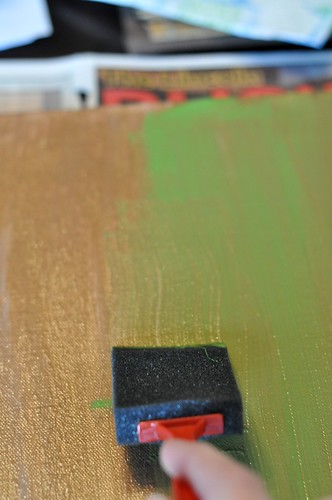
Then I painted a layer of New Grass over the glue.

Painting with Glue


I wasn't patient enough to let it dry so I pushed the drying time along with my hair dyer.
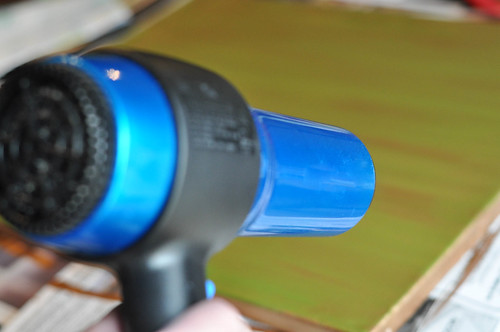

Painting with Glue


After it appeared dry, I took my cloth and wiped away areas of the paint.  It should appear a little crackled.
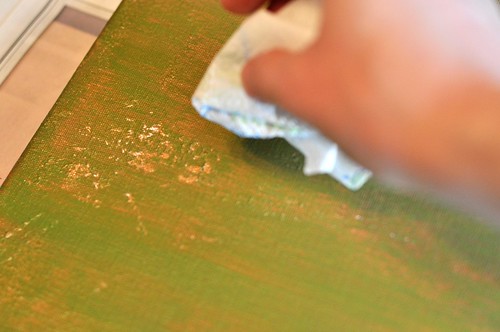

Painting with Glue


I like the antique and worn look that it gives the painting.  However, I wish there wasn't as much white showing through.  I think next time I need to be more patient and let it dry a little more.
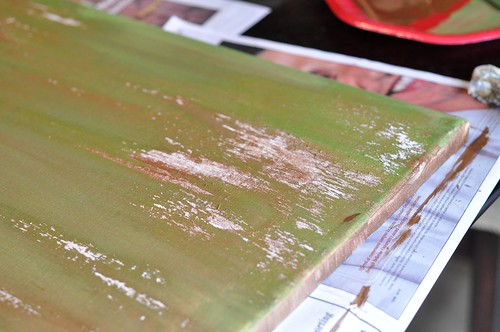

Painting with Glue


Once you are happy with the final result, spray some sealer on the painting and you will be good to go!


Using Vaseline as Texture


You will use the same supplies as above, but trade out the glue for Vaseline.
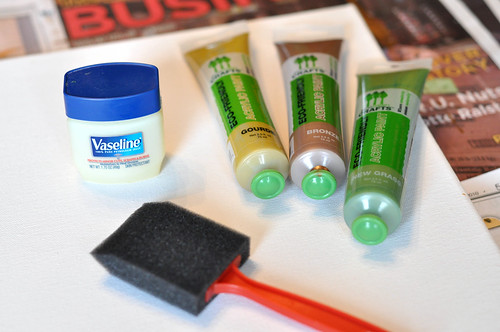


Painting with Vaseline


This time I painted the canvas with New Grass and Gourde.  Beautiful colors right?
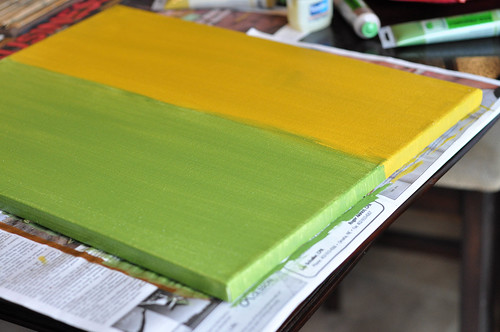

Painting with Vaseline


Then I took the Vaseline and spread it around the canvas.
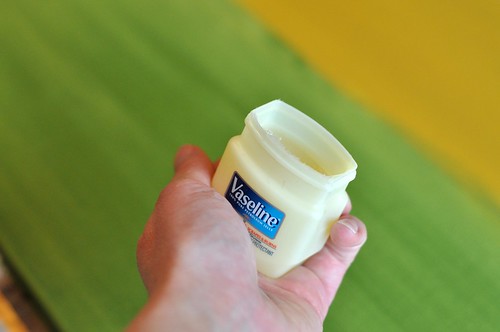

Painting with Vaseline


Painting with Vaseline


Painting with Vaseline


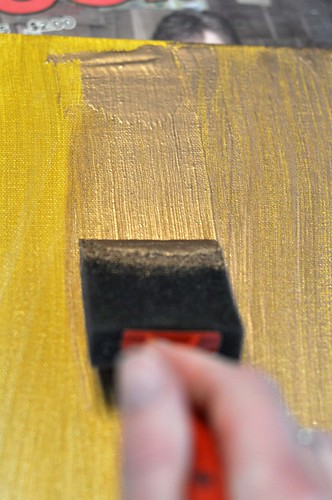
I painted the top layer Bronze.


Painting with Vaseline


I let it dry for a little bit, and pushed it along with the hair dryer again.  In the areas with a lot of Vaseline, it will never fully dry as those are the areas that you work at with your cloth.  {Like in the Glue example}.
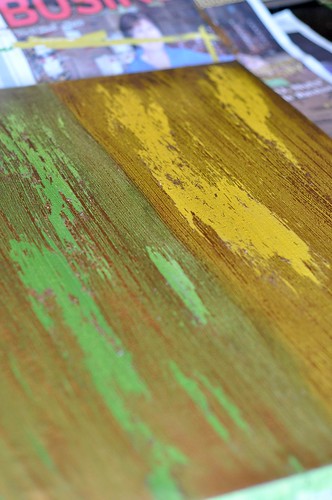

Painting with Vaseline


Then seal the painting and it's ready to be hung on your walls!


This was one of the easiest DIY paintings I have ever done and it only took me about 30 minutes to do both of these.  I love the colors of the painting, but too bad the colors don't quite work with our bedroom so I will have to think of somewhere else to put them.


So what do you think?


Thursday, May 28, 2009

Make Your Own Canvas Rug

This is a project that I've had on my to-do list for a while!  Try making your own canvas rug!  I think my next place with all hardwood floors will be the perfect place to try it out.


canvas-rug


See the full set of supplies and instructions from Martha Stewart.


erin_sig

Wednesday, April 29, 2009

Color is In!

This winter there were lots of neutral color schemes floating around.  Which I love!  But what about trying a little more color for the summer?  When I was in Chicago this weekend I took this picture of a display at Macy's.  Isn't it beautiful?  I love the crisp black wall with the splash of color on the background coordinating with the different colors of the KitchenAid mixer.


Colorful Store Display

I'd love to paint a few stripes on a board to put up on the wall in some summery colors just like the background of the display.  It would make an easy, quick DIY project!


Have you seen any displays recently that you like?


erin_sig

Tuesday, March 31, 2009

How to Paint- Using a Brush & Roller

Now that we have all of our supplies and have done all the prep work to our space, we are ready to paint.  Do you have trouble painting with a brush and making sure your lines are straight?  I will be giving some pointers on what works for me and how I keep my lines straight.

How to paint


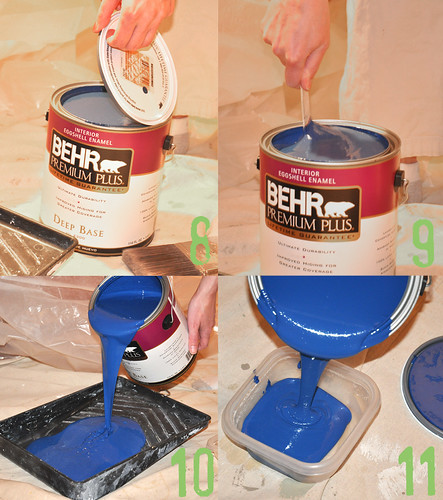
Steps 8 & 9: Open paint & stir.  You want to be sure to stir the paint really good so it is consistent throughout.

Steps 10 & 11: Pour the paint into two different paint pans.  I use a large paint pan for the roller and a small container for the brush- just make sure it's wider than the brush.

How to paint


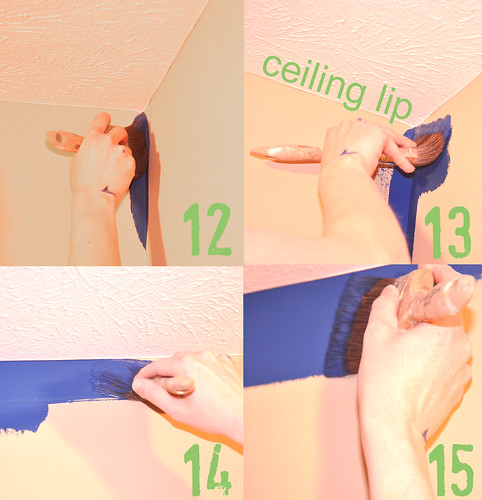
Step 12: Start with your paint brush in one corner.  Notice how I'm holding the brush and it's at an angle.  Angle the brush so it comes to a point and slowly work your way to the top of the corner where the ceiling and walls meet.

Step 13: Most ceilings have a slight lip which makes for slightly easier painting with your brush.  Use this lip to guide you.  Again, look how I am holding the brush.  I angle it to make my way toward the ceiling lip.

Step 14: One I have the paint brush where I want it, I start dragging it along (but under) the ceiling lip.  I usually drag the brush for about 12"-18" depending on how loaded my brush is with paint.

Step 15: I go back over the section I painted in the previous steps to make sure my paint coverage is good and there aren't any places I missed.  I usually leave about a 2.5"-3" paint line on the top and bottom of the wall to provide sufficient clearance for the roller.

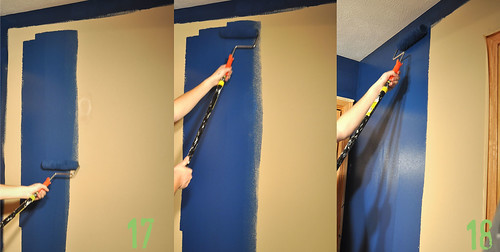
Step 16: Paint along the baseboards in the same section that you painted the ceiling.  The baseboards are a little more simple as there is tape there protecting the wood.  However, don't overload your brush with paint.  If you have too much paint, it will start to bleed underneath the tape.

How to use a paint roller


After you have gone along the wall with the paint brush for about 4'-5', the roller can start rolling.

Steps 17 & 18: Start about half way down the wall with short rolling strokes in the letter of a N or M.  Then start to straighten and lengthen your rolling strides.  Be sure to watch for ridges that are coming from your paint roller and flatten them as you go.  Get as close to the corners and ceilings as you can without scraping them.

Step 19: Remove all masking tape from the trim as soon as you are done painting.

Enjoy your new paint job, now it's time to decorate!

Paint is by Behr and is called Mediterranean Blue.

deb_sig

Friday, March 27, 2009

How to Paint- Supplies & Prepping

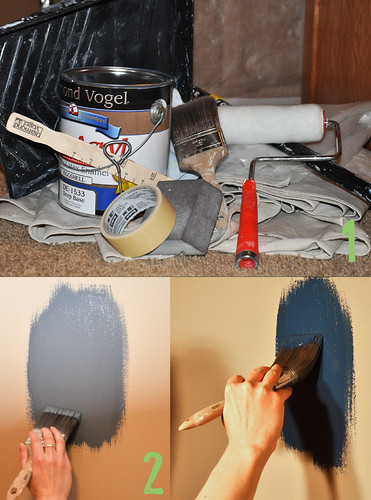
Do you have a room that needs to be painted, but you don't know where to start?  Never fear, we are here and will show you how to paint a room step by step.  This first post will focus on the supplies needed and how to prep your room so it's ready for paint.

How to paint


Step 2: Paint a swatch (or two, or three!) to make sure you like the color before you invest time into painting the entire space.  I usually paint about a 1'x1' square on the wall and revisit it after it drys to make sure I like it.


How to paint


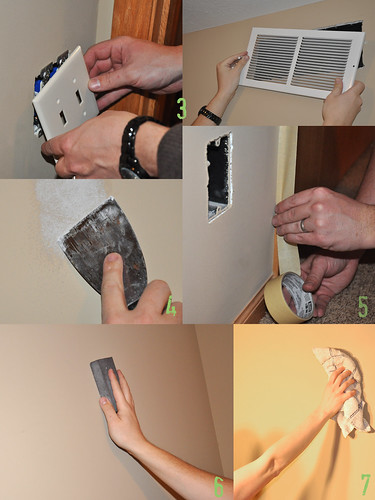
Step 3: Remove all hardware from the room- i.e. light switches, vents and plugs, etc.


Step 4: Spackle holes that you no longer need and patch any repairs on the walls.


Step 5: Use the 1.5" masking tape and tape to baseboards, door/closet trim.  Use this to cover up any woodwork that you don't want the paint to get on.


Step 6: Sand the entirety of the room.  Not only the spackled areas, but the rest of the walls too.  This ensures a smooth finish to your final paint job.


Step 7: Use a old towel to remove any dust left by the sanding.


Now you are ready to paint!  See the step by step tutorial here for painting tips.


deb_sig

Tuesday, January 06, 2009

Carpet Blues

Saturday was one of those days where I wished we never would have gotten out of bed. We had plans to put away the Christmas decorations and paint the office. Remember how I said that one of my New Year's Resolutions was to do something that scared me once a month? Well, my friends, I decided to choose a very bold color for the office... one of which I wasn't absolutely sure would go with the rest of our netural house decor. The color I settled on was a turquoise/seafoam color. I thought a 'pop' of color would be nice.

I returned home on Friday with paint in hand and set it on the ledge on the stairway as that's the first place to set stuff right when you come into our house. Fast forward to Saturday when I ask Casey if he can take the tree out of the house. He happily obliges. On his way out the door, I hear a big boom and just think that he knocked the gate off the top of the stairs, but then I look a little closer.... the paint can had been knocked off the ledge at the top of the stairs and split open and was pouring out onto the top step and onto the second step. Here is a picture after we soaked up most of the paint (3/4 of the gallon poured out).

We soon realized it was a lost cause to try and salvage the carpet at all. I made a few quick phone calls and was scheduled someone to come out Monday to replace the carpet. Luckily we had a remanent left over from the original installation.

If only the story would have ended there, though. Since we had a little paint left, I decided to paint a swatch in the office to make sure we liked the color before I went to go get more paint. Casey was busy doing something and decided he needed his drill. As he went downstairs to get his drill, King Jonzy decided to follow him. As he followed Casey, he stepped in the paint and managed to paint about 50 blue paw prints down the remaining stairs and in the rec room located in the basement. Who ever said this dog doesn't have talent? I think he circled around a couple of times before he realized where Casey was.

In the hustle and bustle of grabbing the carpet cleaner and scrubbing. And scrubbing. Scrubbing for 3 whole hours, I didn't get a picture. I know, I know, my priorities were not in line! Here is a picture of one of Jonzy's feet AFTER getting in the bath. You will probably have to click on it to even see the paint.
This picture really doesn't do it any justice. All of his four paws were covered in paint and one of his front forearms was too. Lets just say Jonzy is happy to be alive today and we are so glad that Saturday is over.

Wednesday, July 11, 2007

No place like home

Whew! I don't feel like I'm spinning so much anymore. You want to know why???


The Basement (phase 1, anyways) is done!!!! Party, party. Here is a picture of the main area... keep in mind the decorating is still in progress...
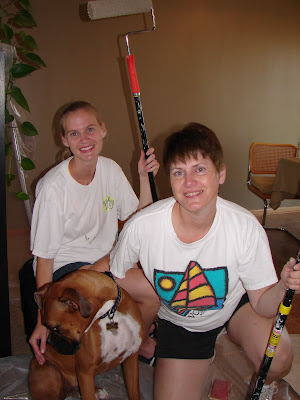
While the boys were downstairs putting in the final touches, us girls (my mom, sister, Kris & I) were upstairs putting on a fresh coat of paint. And Jonzy too!


Below is Jonzy... he is sick of house work by this point. Can't we just live in a house without having a mess all the time?

While we were purchasing the sofa set for the basement, we found this lovely jewel for a price too good to pass up. The house is finally starting to come together and feeling a little bit like home.