I'm loving the trend lately of featuring furniture pieces in art or other made objects! I guess you could say I'm a furniture junkie!


I Like to Rock Poster featuring the Eames Rocker.


I'm loving the trend lately of featuring furniture pieces in art or other made objects! I guess you could say I'm a furniture junkie!
I Like to Rock Poster featuring the Eames Rocker.

Aren't these interior design themed coasters from peppersprouts amazing? I love the simplicity of the simple shapes and cut outs on natural cherry!
Home Sweet Home Coasters
Take A Seat Coasters
Isn't this the most beautiful Moses basket stand for little ones? Nathan designed it for his new little one.
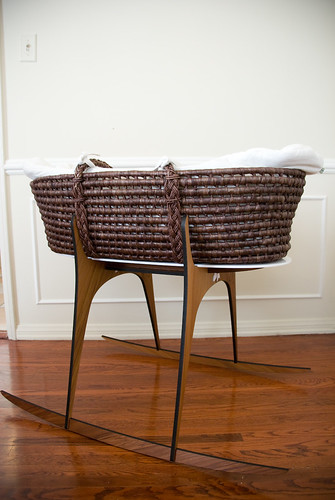
But wait, it gets even better!
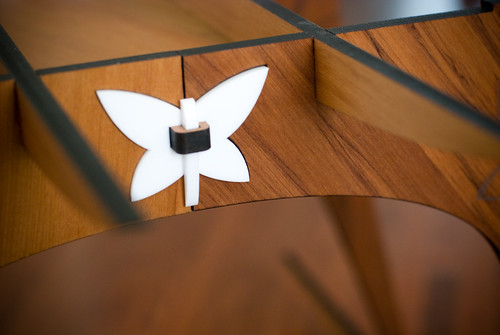
Butterfly joints keep some of the pieces together.
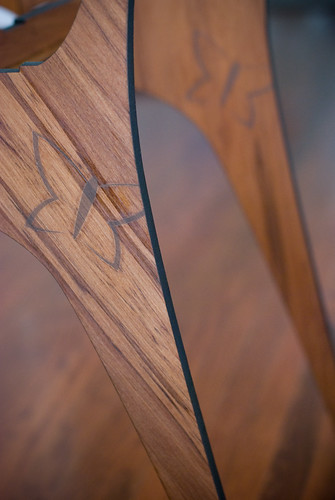
While other butterflies are engraved on the legs....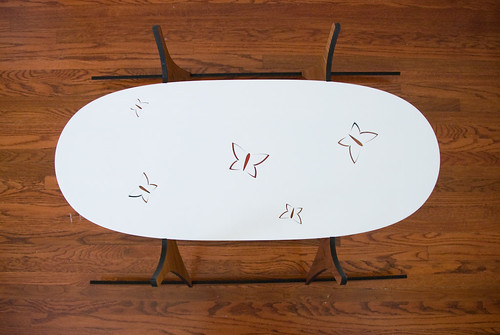
...and the platform where the basket sits. Love the details that went into this piece!
I've been following this blog for a while and just LOVE it! It's put together by Ana and called Knock Off Wood. She takes things she sees in stores like Pottery Barn, West Elm, Land of Nod, and other stores, and makes the plans and a shopping list of supplies so you can make your own pieces for WAY less! Here are some examples of her plans and finished project! Be sure to go over and check out her awesome site!

This hutch as seen in Canadian House and Home was the inspiration for the plans for the hutch below!

This is what the finished piece will look like, go here to see the full list of instructions, supplies and everything else you need to get started!

These are some of my favorite shelves from Pottery Barn Kids, but at a hefty price tag of $900, not always affordable!

Ana shares the plans and finished shelves with us...and the best part is that she spent only $60! She's a genius!!
Worried about not being able to build these pieces? Check out her newly created Flickr Gallery to see what people just like you have been building with her plans! I can't wait to get back into a house so I have a garage to build some new furniture in!
Enjoy!
 {3 seat sofa- Chelsea Dark Grey}

I was introduced to a Flickr Pool called Furniture Redo via How About Orange and thought I'd share some of my favorites. I love repainting older furniture pieces for a great new look! (In fact I'm repainting one of my pieces now! I'll share shortly!) It's super easy and gives you a whole new look!

From Knack Studios


One of our readers Christy wrote us with the following dilemma:
"My couches are nasty but not nasty enough to get rid of--especially with my kids! I'd like to have some slipcovers that I can wash but I'm overwhelmed by what is available. I can handle something DIY but I want them to be snug and not look like, well, slipcovers. Am I asking for the impossible here? What do you think?"
Christy is right, there are lots of slipcovers out there that scream "I'm a slipcover!" The main reason they look like this is due to the fact that sofas come in many sizes, shapes, and styles and the slipcover manufacturer must make their slipcovers to fit as many sofas as possible. This tends to have features like bunched fabric, extra fabric, or skirts that are too long or too short. (Good thing apparel manufacturers don't try to do the same thing!)
Christy, good news is, if you know your way around a sewing machine you can essentially make your own pattern with a little effort. I just finished helping one of my clients do the exact same thing. While I didn't sew them myself I worked with my workroom to make sure they were fitted, and not more of the drape and tie type of slipcover. I watched her very carefully during the process so I could make my own later, and share with you how it's done.
Things you'll need to make the pattern:
1 bolt muslin fabric
Lots of pins
Pinking Shears
You'll want to start off with the bolt of muslin. (Sometimes I'll go straight to working on the pattern with the final fabric to be used, but since upholstery fabric can get expensive, and, depending on the design of your sofa you'll need 10-15 yards of fabric we'll use inexpensive muslin to create the pattern and then cut out the final pieces with your fabric.)
If your cushions are removable, go ahead and remove them so you have the basic shape of your sofa. Lay a large piece of fabric down on the sofa seat. (It's called the deck without the cushions there.) Cut out the exact shape leaving 1/2" extra fabric around all the edges. Continue to cut the pieces out by draping the fabric, trimming, and then pin together. You're essentially putting the pattern together right there on your sofa. If you're having trouble figuring out where to cut the pieces and make seams, just look at how your current sofa is upholstered, and anywhere there's a seam, you know that you will also need a seam there.
After you've got the sofa pattern completed, make separate templates using your cushions. If the seat cushions are all the same size, just do one template and use it for all of them. Do the same for the back cushions.
When you've got your pattern made you're practically there! Be sure to prewash the upholstery fabric you're using first. We wouldn't want to sew the entire slipcover, and then have it shrink on us!!
Remove all the pins from your pieced pattern (be sure you number or label them to keep then straight!) and lay them out on your final fabric. Cut the pieces out and sew together. Remember to match patterns if your upholstery fabric has a pattern to it. If you're using a suede or other fabric with nap, keep that in mind as you cut out the pieces too. (For good instructions on the order in which to sew everything see here.)
Sew your cushion covers and place on your sofa! You just made a custom fitted slipcover!!
Be sure you keep your muslin pieces so you can sew different slipcovers later!
Katie has a difficult space to design. There's a lot going on and her house was built in the 50's when they loved using lots of wood wainscoting and sometimes wood paneling for the entire wall. Remember her before pictures? Here's her redesign:

1-2. Let's paint! Paint the Wainscoting Sherwin Williams color 6090 Java (1), and paint the ceiling Sherwin Williams color 2813 Downing Straw (2). Leave the ceiling beams exposed but paint between them. This will help accentuate the beams and help to tie in our other wood pieces throughout the space.
3. Linen Wallcovering. This will provide a nice textured finish above the wainscoting in the room. It will keep things nice and neutral while providing a more earthy feel to the room.
4. Keep things clean but understated with the Sheffield Sofa from Chiasso. This is a great priced sofa for the design! It's very unassuming, and although large, doesn't seem to take up space because of the small scale of the legs and arms.
5. Accent the sofa with some great earthy pillow covers from IKEA in green and blue.
6. Stumped Block Stool End Tables topped with a glass top for a larger table top space for accessories and a lamp.
7. Light things up with this great Walnut Cutout Lamp. This is a great clean lined lamp and adds some warmth to the room with the beautiful walnut base!
8. The Audrey Coffee Table from Overstock.com is also a clean lined piece that help us go with the more earthy feeling of the room. I LOVE the mixture of the dark and light woods. This piece is gorgeous and a steal for only $220.
9. Custom Paneled Fireplace (idea from Rex Brown). Build out the sides and top with wood paneling painted to match the wainscoting. With your leftover linen wallcovering, add it to the insets between the molding above the fireplace. By building out the paneling you will leave room behind to run the cable through the frame and add enough wood blocking to hang your TV above the fireplace making just one focal point for the entire space. (This also let's your husband keep some of the brick that he liked, while keeping it understated and making the mantle and above the fireplace more of a focal point.)
10-12. Top off with a few natural accessories like a vase from Salmon Pottery(10), a bud vase from Lurearts (11), and some walnut picture frames from Black Elm (12).
Thanks Katie for letting me redesign your space! It was tons of fun and might be one of my new favorite redesigns! Want us to redesign YOUR space? Click here.
So you remember last week when we had a little competition and asked Marie and her readers to vote for their favorite design? It was very hard to tell whose design was ahead. It was neck and neck the entire time!
The results have been tallied and the winning design by a mere 3 votes is the design by Erin!

Marie says she likes both the designs. So how about this Marie? You pick the elements you like from each design and we'll help you design your living room with a little bit of both designs! We can't wait to see the finished product! and
Sometimes it's hard to find children's furniture that doesn't scream that it's for children. You know, the plastic ones? These chairs are beautifully crafted and child size and I can't help but love the multi-toned stain on the chairs too!! I'd love to have these around my house!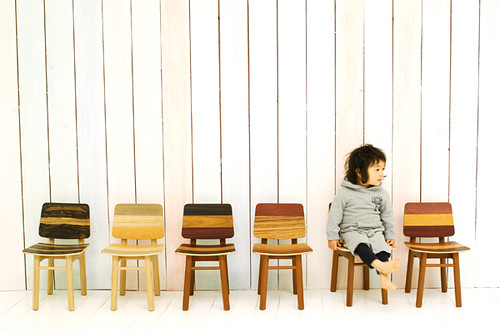
Chairs from Leif Design Park.
 {image via Vastu}
 And the most important tip by far, is to "Space Plan, Space plan, space plan". Before any project, especially before spending major money on furniture, you must know what will fit in the room and where it will be placed. Whether you draw it out yourself or you use an easy, magnetic space planner (The Kelli Kit) make sure you have your plan "to scale" and then you can confidently shop for new furniture and accessories. Happy Hunting!!
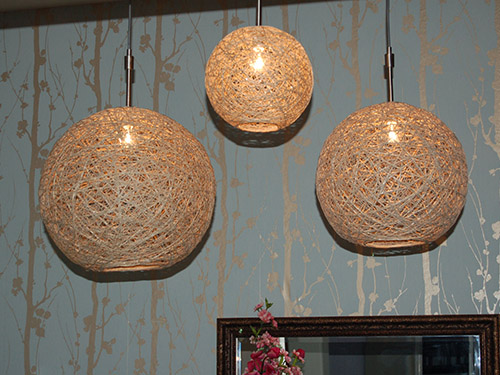
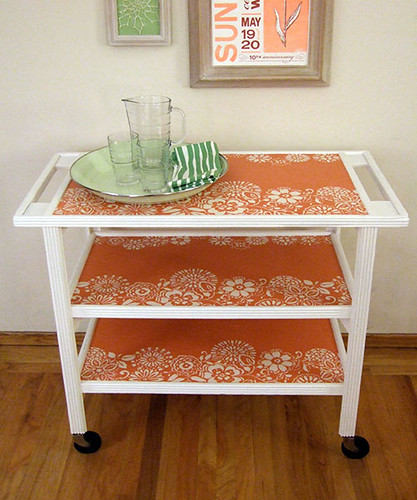
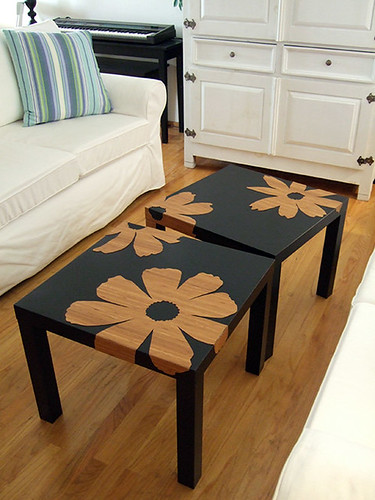
{all images via Craftynest}
The site also showcases a recently refurbished trolley cart using wallpaper and sprucing up some ordinary ikea tables. An inspiring site that makes me want to go out and find something old and make it new to fit my home.

Don't you just love the statement this chest of drawers makes? This is from the Collect collection from Wis Design. This would be super simple to make your own with the same effect. Take any chest of drawers you've got and the possibilities are endless! Try painting the front, adding colored or patterned paper to the front and you've got a custom piece that fits perfectly with your home! Switch out the hardware for an even more custom look! (And not to mention, fits within any budget!)
P.S. Don't forget to enter in to win a room design from us! Just follow the instructions in the post here to be entered! The deadline is midnight tonight, April 7th!



 Posts
All Comments
Posts
All Comments
 {
{

