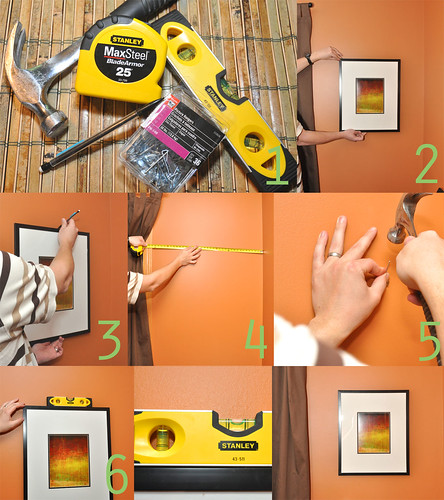
My husband was kind enough to be my model here as I think he's the King of hanging pictures. Here is a step by step guide to hanging pictures.
Step 1: Gather your supplies needed:
- Hammer
- Tape Measure
- Level
- Pencil
- Picture Hangers
Step 2: Place the picture where you want to hang it.
Step 3: Mark the height of where you want to hang the picture- keep in mind where the picture will hang- often times it's a couple inches lower than the top of the frame/item.
Step 4: To center your item, use a measuring tape to measure the length of the wall. Mark the middle on the wall with your pencil. In this instance we have drapes that go beyond the window trim so took this into consideration and used the end of the drapes as one of our end points.
Step 5: Install picture hanger where your pencil marks meet and make an x.
Step 6: Hang the item and place the level on top to to make sure it's straight.
Picture shown is by StudioMarlene.


No comments:
Post a Comment